top of page

 | 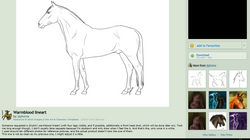 Step 1Find a lineart, or draw your own. Deviantart has many linearts and reference photos that are free to use, but make sure to follow the artist’s rules AND always credit the lineart provider ON the image. When looking for an image, always look in the “resources and stock images” category. Click download to get the full size for higher quality works. |  Step 2Open the lineart in the art program of your choice. Some examples: Gimp, Photoshop, Paint, ArtRage, Sumopaint, Paint.net, etc. There are many free online or downloadable programs if you look online. For this tutorial I am using Adobe Photoshop Elements 7. |
|---|---|---|
 Step 3Set the lineart as a layer and adjust the layer type so it’s set to “multiply”. In gimp you can use “color to alpha” and set the colour to white in order to get rid of the white part of the lineart. |  Step 4Create a new layer underneath the lineart layer. Name your layers so it is easier as you move along in your project. |  Step 4Create a new layer underneath the lineart layer. Name your layers so it is easier as you move along in your project. |
 Step 5Now it’s time to choose your colours! Create a palette and fill in the base colour(s) at 100% opacity with a round brush at 100% hardness. |  Step 6Erase any excess colour with a round eraser at 100% hardness. Hide the lineart layer to check that the outline is nice and smooth and just the way you want it. |  Step 7Lock the opacity of the base layers. |
 Step 8Begin blocking in shadows and highlights using a round brush at 50% hardness and 50% opacity. Use the colours in your palette. If you need to add a different colour, add it to your palette as well. |  Step 9Using the round brush, now at 50% hardness and 10% opacity, use the colours in your palette to start to blend the blocked layers. Use a smaller brush to add detail in areas such as the face and legs. I like to start with the head because it is the most difficult part. |  Step 9Continue until you have finished the entire body, hooves, eye, and hair. Using the round brush, at 50% hardness and 10% opacity, use the colours in your palette to blend the blocked layers. Use a smaller brush to add detail in areas such as the face and legs. |
 Step 9Continue until you have finished the entire body, hooves, eye, and hair. Using the round brush, at 50% hardness and 10% opacity, use the colours in your palette to blend the blocked layers. Use a smaller brush to add detail in areas such as the face and legs. |  Step 9Continue until you have finished the entire body, hooves, eye, and hair. Using the round brush, at 50% hardness and 10% opacity, use the colours in your palette to blend the blocked layers. Use a smaller brush to add detail in areas such as the face and legs. |  Step 9Continue until you have finished the entire body, hooves, eye, and hair. Using the round brush, at 50% hardness and 10% opacity, use the colours in your palette to blend the blocked layers. Use a smaller brush to add detail in areas such as the face and legs. |
 Step 10You’re almost finished! Delete the lineart layer and clean up any areas you think can benefit. Add other elements such as more colours, socks, spots/speckles, wings, a horn, tack, designs, or anything your mind can create! |
bottom of page